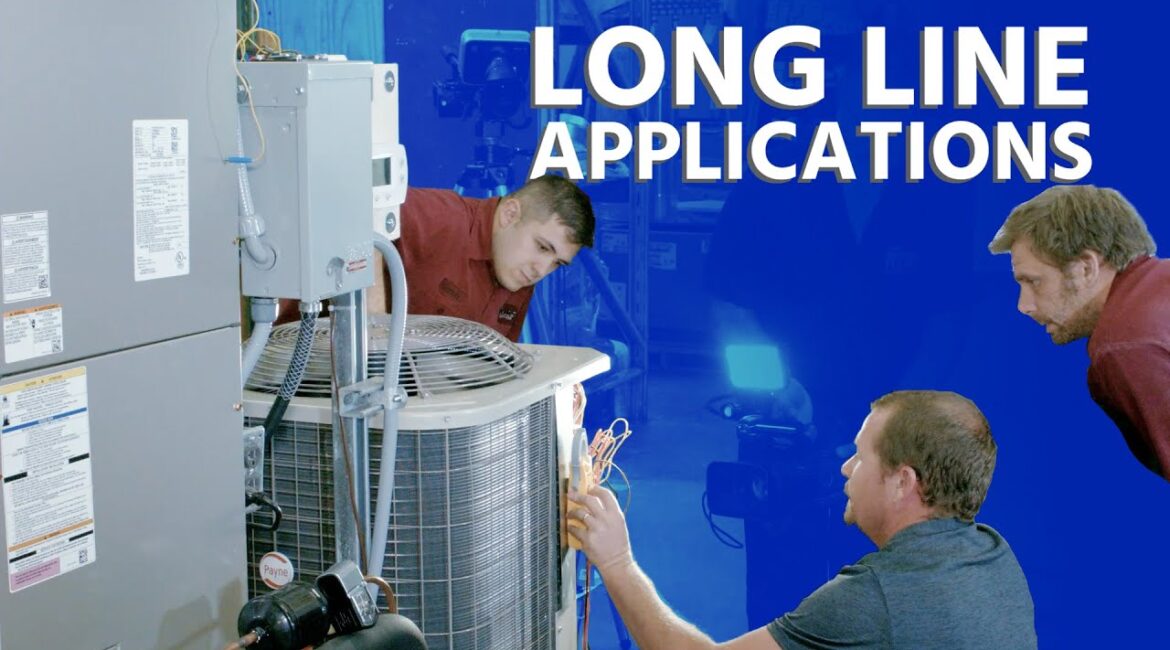
In this class, Bryan teaches the Kalos techs about long line applications, accessories, and allowable line lengths. Many techs don’t fully understand the challenges of long lines. So, Bryan covers a wide range of issues and practices with long lines.
You can find the long-line piping guide we’ve used at https://carriercca.com/pdf/products_pdf/24ABB3_data.pdf.
Long lines can cause refrigerant migration. Long lines simply move more refrigerant, making migration much more likely. On top of that, a pressure drop is possible throughout longer suction lines. When you have a lot of refrigerant inside the suction line when a unit is off, it will often migrate to the condensing unit. (In a few specific cases, liquid refrigerant may migrate to the evaporator. Your unit is at risk of a flooded start when that occurs.) We also shouldn’t bury suction lines for long distances to reduce the risk of a flooded start. The ground is typically colder than the air, so the refrigerant is more likely to condense in the suction line if it is underground in a cold place.
When the system is off, you ideally want liquid refrigerant to be in the liquid line or condenser coil. Anywhere from the discharge line to the metering device is in the “safe” zone for liquid refrigerant. So, when adding liquid refrigerant to a system, you will want to add it to the liquid line so that it can vaporize in the evaporator before making it to the compressor. We NEVER want liquid in the compressor, and we only want vapor to be in the compressor while the system is running.
Straight-cool long-line A/C systems require TXVs if the line’s total length is over 50 feet. If the outside unit is above or below the indoor unit, that system will require a TXV if the line length exceeds 20 feet. TXVs are required in long-line applications because they have hard shutoff (HSO) or non-bleed valves that help prevent refrigerant migration.
A long-line A/C system may also require long-line accessories. These requirements depend on the liquid line diameter, the presence of a TXV, and where the outdoor unit is located in relation to the indoor unit (above, below, or level). The range for minimum lengths can be between 35-175 feet, depending on each of those factors. (Most of the time, we use ⅜” liquid lines with a TXV, so the minimum is usually 80 feet.)
Heat pumps with a ⅜” liquid line diameter and TXV will need long-line accessories if the lines exceed 80 feet in length (or if the vertical difference between the indoor and outdoor units exceeds 20 feet).
Pipe fittings add equivalent length, so be sure to take those into account when you measure line lengths to determine if you need long-line accessories or not.
Your allowable line lengths will be significantly greater when your condenser is above your air handler. When your condensing unit is higher, the refrigerant going to the air handler will maintain pressure more easily as it moves downhill towards the metering device. The static regain keeps the pressure drop from getting too strong.
In the case of our Carrier heat pump, we have level indoor and outdoor units situated 100 feet apart. We have a ⅜” liquid line with a TXV, so we will need a long line because the distance between the indoor and outdoor unit will exceed 80 feet in length. As a heat pump, the unit will need a standard accumulator. Based on our accessories guide, we need a compressor start assist capacitor and relay (hard start kit), crankcase heater, and hard shutoff TXV. However, we also need a liquid line solenoid valve (LLSV). These LLSVs are NOT for pump-down applications; this LLSV shuts down the liquid line when the system shuts off.
The hard start kit helps start up the compressor. The capacitance needs to be properly matched to avoid putting too much current on the start winding, so it’s a good idea to use the manufacturer’s hard start kit, not a universal one.
When it comes to installation, we start off by installing the bellyband crankcase heater. The schematics can tell you how the crankcase heater attaches to the wiring. Remember, we only want the crankcase heater to energize when the unit is OFF. When we power up the condenser ONLY, we no longer read voltage to the crankcase heater. When we shut the unit off again, our meter begins to read voltage again.
The next step is to install the hard start kit. We can test it by measuring our start amps with it in and without it in.
We install the liquid line solenoid on the liquid line. It is a normally closed valve that opens when energized. It should be installed two feet from the condenser, and the arrow on the valve must point towards the outdoor unit.
We also discuss:
Pump-down or pump-off systems
Potential relays
Capacitor windings and startup amperage
Wiring diagrams
Check out information on the 2022 HVACR Training Symposium at https://hvacrschool.com/symposium/.
Read all the tech tips, take the quizzes, and find our handy calculators at https://www.hvacrschool.com/.
source